|
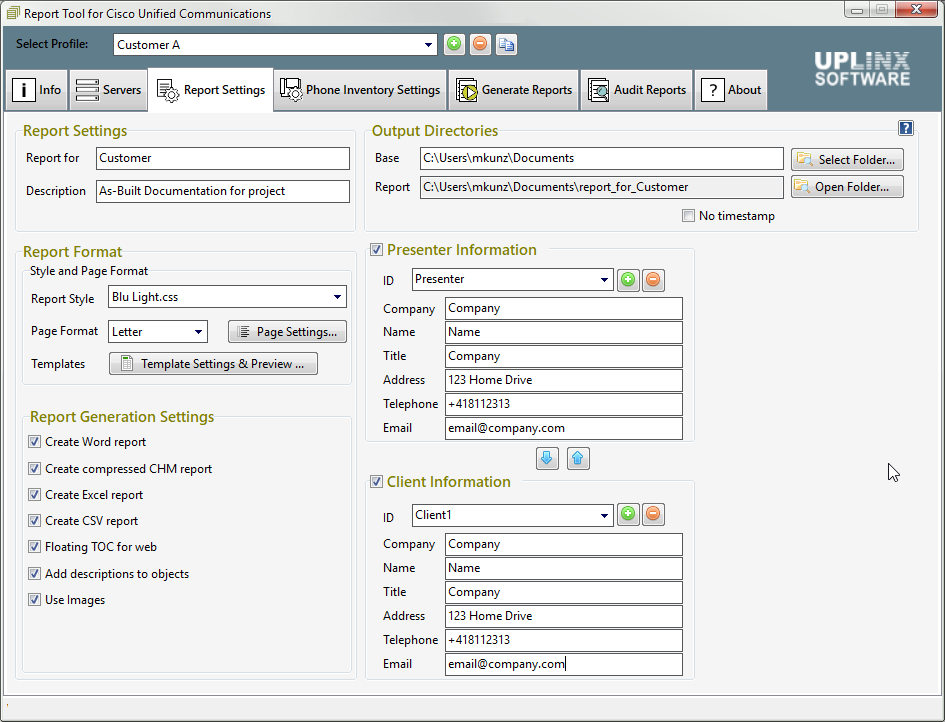
The report format is configured in the tab Report Settings. Though, report styles are ingrained into the HTML and Word templates.

1.In the group box Report Settings set the following:
oThe Report For text field: This will be used in the title and filename of the report. You may wish to use the customer’s company name, and/or the purpose of the report. (e.g Audit for UPLINX Software ).
oThe Description; text field: This will be placed below the title in the generated report and should describe details of the author or the source of the report (e.g. Created on 27 July 2019 by John Smith ).
2.In the group box Report Format set the Style and Page Format :
oReport Style : This selects the CSS (Style sheet) and determines the style of the report.
oPage Format : A4 or Letter.
oPage Settings : Set the border size of the pages, use default to set standard sizes for A4 and Letter format. See Word Page Size and Margins.
o
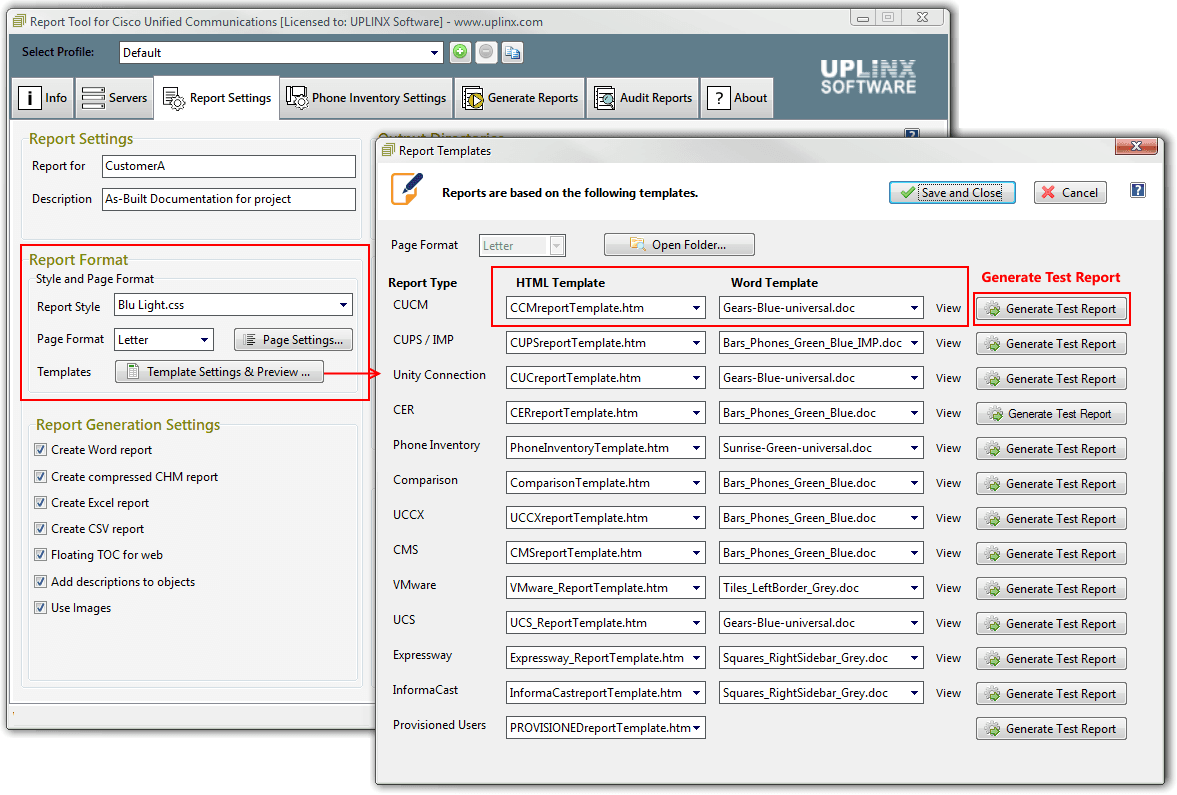
Template Settings & Preview: Set an HTML and WORD template for each report. The Generate Test Report generates a sample report to test and preview the template without any need for a server.
oIn the Report Tool Setting tabs, click on 'Template Settings & Preview' button and select your templates.
Reports are generated based on 3 templates:
1.CSS file(important for Word and HTML reports)
2.HTML template (important for Word and HTML reports)
3.Word template (important for Word reports)
To preview the style and test the selected templates, please press the button Generate Test Report. See Default or Stock Templates for an overview of templates that are bundled with UPLINX Report Tool.

oTo create your own templates, please navigate to Customizing Your Own Report Templates.
3.In the group box Report Format set the Report Generation Settings :
oFloating TOC for WEB : Ticking this tab will generate a navigation strip on the right side of the generated web report for easy navigation.
Recommended: Enable.
oCreate compressed CHM report : Creates a CHM (Compressed HTML Help) file when the report is generated.
Recommended: Enable .
oAdd descriptions to objects: When ticked, this option adds a descriptive text to each object in the report. To customize this text, please refer to the section on Customization .
Recommended: Enable.
Additonal options include:
•Use YN instead of tick boxes .
•In the group boxes Presenter and Client Information you can set your and client information as it is displayed in the Document Information section of the word or HTML document. When the tick boxes of these 2 sections are not selected, the document information section will not appear in the reports.
To customize report templates, please refer to Customizing Your Own Report Templates .
|